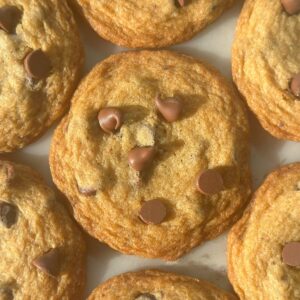
The BEST Brown Butter Chocolate Chip Cookies
These cookies embody everything you love about a classic chocolate chip cookie—a soft and gooey center, lots of chocolate chips, crisp edges, and a slightly chewy texture. But this version is extra tasty thanks to brown butter, which adds a rich, caramelized nuttiness that pairs perfectly with vanilla and a little bit of maple syrup. Make a double batch—these cookies are going to disappear fast!
Pin
Facebook
Email
Yield: 30 cookies
Equipment (Includes Affiliate Links)
- GreenPan Sauté Pan or other light-colored pan for browning the butter
- Small Glass Measuring Cup
Ingredients
- 1 cup salted butter (2 sticks) one stick softened; one for browning
- 2¼ cups all-purpose flour (270 g)
- 1 tsp baking soda
- ⅓ tsp salt see notes on salt content above
- 1 cup light brown sugar packed
- 1 tbsp vanilla extract Nielsen-Massey is my favorite!
- 2 tsp maple syrup not pancake syrup!
- ½ cup white granulated sugar
- 2 large eggs
- 1¼ cup chocolate chips
Instructions
Brown one stick of butter (4-5 minutes).
- Cut one stick of salted butter (½ cup) into tablespoon-sized pieces.
- Add the butter to a light-colored saucepan or skillet. Heat on medium and stir. The butter will melt, then bubble and foam. Stir frequently.
- Once the milk solids on the bottom of the pan are a deep golden brown, turn the heat off. Immediately pour the butter into a glass bowl or measuring cup. This entire process, from the time you put the butter in the pan to it being browned, should take 4-5 minutes. For more detailed instructions, along with tips for browning butter, read here.
- Place the brown butter in the fridge to cool for 15-20 minutes. In the meantime, start your cookie dough.
Make the cookie dough.
- In a medium bowl, add the all-purpose flour, baking soda, and salt. Whisk until well combined. Set aside.2¼ cups all-purpose flour (270 g), 1 tsp baking soda, ⅓ tsp salt
- Add one stick of softened butter and one cup light brown sugar to a large mixing bowl (or to the bowl of your stand mixer). Using a hand mixer, beat on low/medium-low speed until smooth—approximately 3-4 minutes.1 cup light brown sugar
- Add the maple syrup and vanilla extract. Beat until combined.1 tbsp vanilla extract, 2 tsp maple syrup
- Pour in the chilled brown butter. Add the white granulated sugar and mix on medium-low speed until well combined. You will notice the dough begin to lighten in color and become fluffy.½ cup white granulated sugar
- Add the eggs and beat until just incorporated. Do not overmix.2 large eggs
- Add the dry ingredients and mix until just combined. Scrape down the sides of the bowl with a spatula or spoon to ensure all dry ingredients are well incorporated.
- Fold the chocolate chips into the dough using a spatula/spoon.1¼ cup chocolate chips
- Wrap the dough in plastic wrap, pressing down to form a large disc.
Chill the cookie dough.
- Option 1: Quick Chill. Place the tightly-wrapped cookie dough disc into the fridge to chill for at least 30 minutes or in the freezer for about 15 minutes.
- Option 2: Longer/Overnight Chill. Chill the dough in the fridge for a few hours or overnight. This longer chill allows time for the flour to fully hydrate and for more flavor to develop.
Bake the cookies.
- Preheat your oven to 350°F.
- Form the chilled dough into 2 tbsp balls (I scoop a generous amount with a #40 cookie scoop). Place on a half sheet pan covered with a silicone baking mat or parchment. Flatten each ball with the palm of your hand to form flat discs.
- Bake 9-11 cookies per sheet pan at 350°F for 11-12 minutes. The cookies will be golden brown and the centers will no longer look wet when they are done baking. Once you remove the cookies from the oven, allow them to sit on the sheet pan for 5-10 minutes, or until the centers are set enough to easily move them with a spatula to a wire cooling rack.
- Optional: Press a few extra chocolate chips onto the top of each cookie when they are still warm from the oven for that aesthetically pleasing, bakery-style look!
- Allow the cookies to finish cooling on a rack. Then, enjoy! Store leftover cookies in an airtight container or bag on the counter.
Notes from the Happy To Be Here Kitchen
Please see detailed ingredient notes (including an important note on the salt content for this recipe), along with in-depth instructions for browning butter and making these cookies in the post content above. Starting right here!
Cook With Me
Share This Recipe:
Did you try this recipe?Click here to leave a rating and review!
