Why You’ll Love These Brown Butter Chocolate Chip Cookies
- The Perfect Chocolate Chip Cookie Texture—You know exactly what I’m talking about—soft, gooey center, slightly chewy, with perfectly crisp, golden edges.
- Brown Butter Flavor—Browning half of the butter in these cookies gives the dough a caramalized, nutty flavor that pairs perfectly with vanilla and a little maple syrup. Basically, if you love the idea of a classic chocolate chip cookie, but just a little fancier and richer—these are for you!
- Flexible & Make-Ahead Friendly—Chill the dough for 30 minutes, a few hours, or overnight—or freeze some dough, so you’re always ready for fresh-from-the-oven cookies on demand!
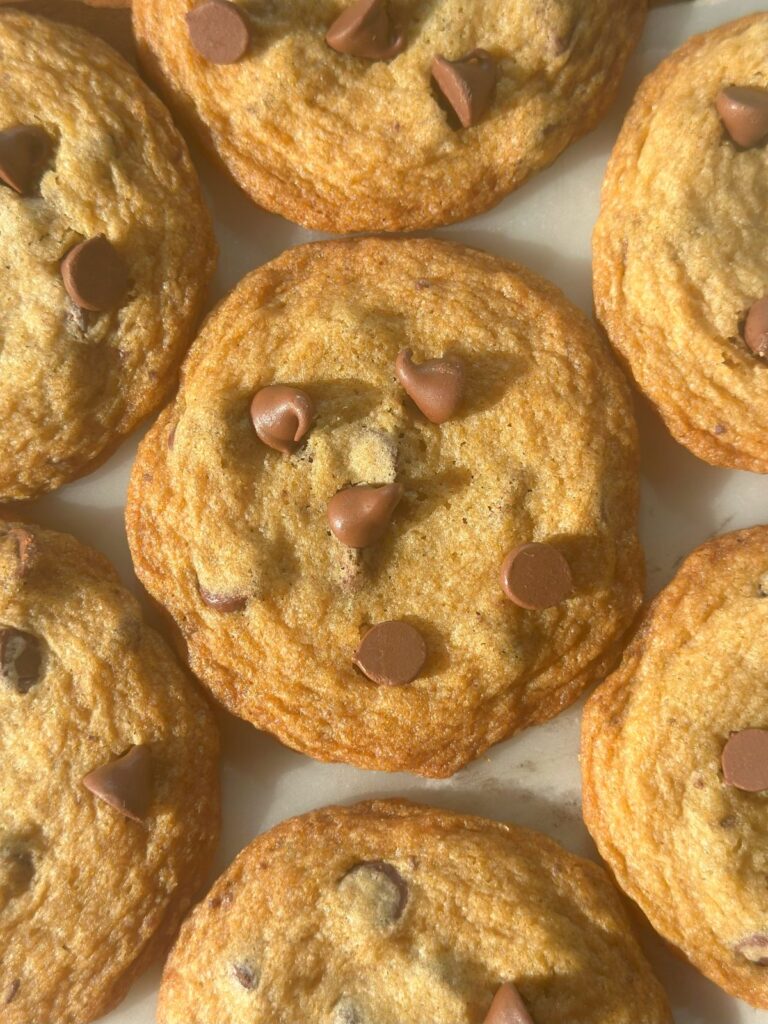
Is there anything better than a pan of freshly-baked chocolate chip cookies? Actually, yes—a freshly-baked pan of these brown butter chocolate chip cookies. After testing batch upon batch (upon batch) of cookies, I present to you what I think is the perfect brown butter chocolate chip cookie—with crisp (but never crunchy) edges, a soft and gooey center, loads of chocolate chips, and a dough so rich and flavorful it could honestly stand on its own.
Chocolate Chip Cookie Ingredient Notes
Shop all linked products/ingredients on Amazon!
Butter: This recipe uses two sticks (1 cup) of salted butter—one stick will be browned and chilled before being added to the dough, and the other will be added as is. In pursuit of the perfect brown butter chocolate chip cookie, I found that browning only half the butter strikes the best balance between texture and flavor. You still get that yummy, rich, nutty flavor from golden brown butter, while maintaining the moisture and structure needed for that classic chocolate chip cookie texture.
Salt: I use salted butter in just about all of my baked goods (you’ll notice this all over HTBH!). One concern with this, of course, is that different brands of butter include varying amounts of salt. Here are some notes to help you make sure the salt content in these cookies is just right…
- The total salt you are aiming for with this recipe is 1 teaspoon. So, if you use unsalted butter, simply add 1 whole teaspoon of salt.
- If using salted butter, take a look at the sodium content of the specific brand of butter you are using. Add only the amount of extra salt needed to supplement the salt in two sticks of butter so you reach a total of 1 teaspoon of salt in the dough.
- To illustrate, 1 teaspoon of salt contains about 2,300 mg of sodium. The salted butter I use contains 90 mg sodium per tablespoon, so 2 sticks (or 16 tablespoons) contains 1,440 mg of sodium—just about 2/3 of a teaspoon. That’s why the recipe card below calls for 1/3 teaspoon salt—to reach 1 teaspoon of salt total in the dough.
Flour: Make sure to either spoon and level the flour while measuring, or use a kitchen scale (like this OXO one) to precisely measure the flour. You don’t want to add too much flour or you risk the cookies becoming dry and crumbly!
Vanilla Extract: As Ina Garten would say, use “good” vanilla. It really makes a difference! My favorite is this vanilla extract from Nielsen-Massey.
Maple Syrup: Make sure to use pure maple syrup (like this one), not pancake syrup. It adds a subtle caramel flavor that pairs well with the brown sugar, brown butter, and vanilla, while also adding some extra moisture to the dough. But don’t worry, these are not maple cookies—it’s just a background note.
Chocolate Chips: Semi-sweet chips are always a good option, but you can also add in some milk chocolate or dark chocolate chips, or mix in some chocolate chunks!
What Is Brown Butter?
Brown butter is regular ol’ butter that has been heated past its melting point—allowing the milk solids in the butter to toast and become golden brown. As it cooks, the butter develops a nutty, caramelized flavor that will impart deliciously rich flavor to the cookie dough. If you’ve been curious about baking with brown butter but hesitant to add the extra step, trust me—it’s 100% worth the extra 5 minutes it will take you for these cookies.
How to Brown Butter (For These Cookies)
1. Cut your stick of butter into tablespoon-sized pieces.
This will help the butter melt and cook evenly.
2. Add the butter to a pan or skillet.
Place the pads of butter in a single layer across the bottom of a pan or skillet. I highly recommend using a light colored pan or skillet—like this GreenPan one. The lighter color makes it much easier to tell when the butter has turned the perfect shade of golden brown.
3. Cook the butter until it browns (approx. 4-5 minutes).
Cook the butter on medium heat, stirring frequently. As the butter cooks, it will go through stages…
1. The butter will melt quickly into a pool of translucent liquid. Use a spatula or spoon to stir so the butter cooks evenly.
2. After a few minutes, bubbles will begin to form on the surface and you will hear the butter snap and crackle—keep stirring.
3. The crackling sound will dial down. Then a white foam will form on top of the butter, and you’ll start smelling a warm, nutty aroma. This is your sign to stir almost constantly—the butter is almost done browning. Since it can be hard to see the color of the milk solids on the bottom of the pan through the foam, you will need to scrape from the bottom of the pan and push aside the foamy bubbles to check the color.
4. Once the milk solids have caramelized and turned a deep golden brown, immediately turn off the heat and pour the butter into a bowl or glass measuring cup. The total time, from start to finish, should be about 4-5 minutes.
4. Chill the butter in the fridge (15-20 minutes).
Place the brown butter in the fridge and allow the it to chill for 15-20 minutes. This is key for maintaining a desirable dough texture—if you add hot brown butter to the dough, you risk it becoming greasy or grainy.
Tips & Notes for Browning Butter…
- Do not leave any of those toasted milk solids behind—that’s where a lot of the flavor is! Scrape every last bit out when transferring the butter from the pan to a bowl/cup and when eventually adding the butter to the dough.
- Do not leave the butter unattended, especially when it nears the end of the cooking process. Once you hear the crackling subside, stir almost constantly—brown butter can turn to burnt butter before you know it.
- Do not skip the chill. The brown butter needs to cool down a bit before being added to the dough, otherwise it could impact the texture.
- You will lose a little bit of liquid through the browning process. This is normal and this recipe takes it into account.
- If making a double batch, and thus browning two sticks of butter, expect the browning process to take a couple minutes longer (6-7 minutes total).

How to Make Brown Butter Chocolate Chip Cookies—Step By Step
1. Brown the butter.
Then place it in the fridge to chill for 15-20 minutes. See full, detailed instructions above.
2. Prepare the dry ingredients.
Add flour, salt, and baking soda to a medium bowl. Whisk well and set aside.
3. Start the dough.
In a large mixing bowl using a hand mixer (or in the bowl of your stand mixer), beat one stick of softened butter and light brown sugar on low/medium-low speed for 3-4 minutes, or until smooth. Make sure your butter is softened but not liquid/melty. Add the vanilla extract and maple syrup and beat until well incorporated.
4. Add the brown butter, white sugar, and eggs.
Add the chilled brown butter and white granulated sugar to the mixing bowl and mix until combined. You will notice the dough become lighter in color and fluffy. Then, add the eggs and beat until just combined.
5. Add the dry ingredients.
Add the dry ingredients to the dough and mix on low speed until just combined. Scrape down the sides and bottom of the bowl to ensure all dry ingredients are incorporated.
6. Add the chocolate chips.
Fold in the chocolate chips using a spatula or spoon.

7. Chill the dough (2 options).
Plop the dough onto a large piece of plastic wrap, then use the plastic wrap to press the dough down into a large, flat disc. Wrap the disc of dough tightly with plastic wrap. Now, it’s time to chill the dough—and you have a couple options…
Option 1. Quick Chill: Place the dough in the fridge for 30 minutes, or in the freezer for about 15 minutes. This quick chill will allow the dough to set up, making it easier to scoop and shape.
Option 2. Long or Overnight Chill: You can also leave the dough in the fridge for a longer period—a few hours, or even overnight. This longer chill allows time for the flour to fully hydrate and for more flavor to develop.
In my experience, the cookies that have chilled for at least 3-4 hours (or, in the best case, overnight) have a more developed flavor, spread less, and turn golden brown more easily in the oven. However, the cookies quickly chilled in the fridge or freezer are still delicious—just expect them to brown slightly less and spread a bit more than those chilled for a longer period of time.
Main takeaway = do not skip chilling the dough. You must give the dough some time to chill and set up. Otherwise, it will be much too soft and pillowy to scoop and shape. A longer chill will allow for more flavor and a slightly better bake, but at a minimum you need a quick chill.
8. Bake the cookies!
Preheat your oven to 350 degrees. If your dough has been chilling for a significant amount of time, set it out on the counter for 5-10 minutes to make it easier to scoop.
Scoop the dough into 2 tablespoon-sized balls. I use a #40 cookie scoop (which holds a little over 1.5 tablespoons), and scoop a slightly overflowing/generous amount for each cookie. Roll each scoop of dough between your palms and press it down into a flat disc on the cookie sheet.
Bake 9-11 cookies at a time on a half sheet pan at 350 degrees for 11-12 minutes. When you remove the cookies from the oven, lightly tap the pan on the counter to allow the middle of the cookies to fall and create that soft, slightly chewy center that everyone loves.
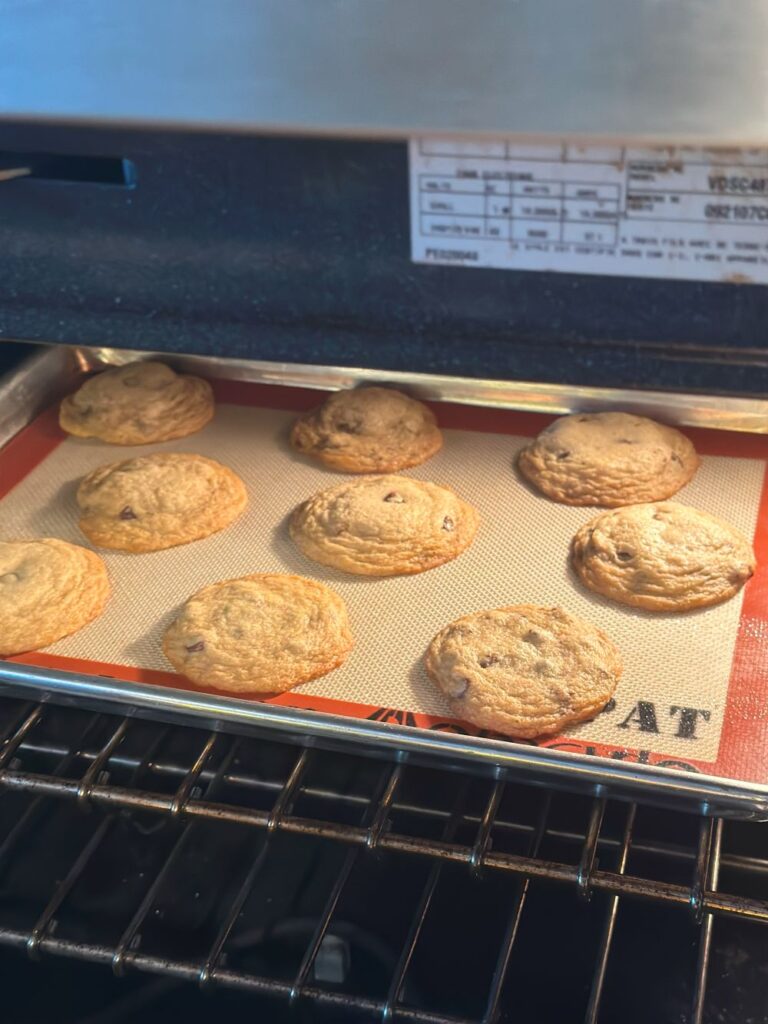
Allow the cookies to cool on the pan for 5-10 minutes. At this time, you can press a few extra chocolate chips onto the top of each cookie for that perfect bakery-style look (completely optional, but very pretty!). Then, transfer the cookies to a wire rack to finish cooling.
How to Store Chocolate Chip Cookies
Store any leftover cookies in an airtight container or bag on the counter for a few days. These cookies keep their texture quite well for a couple days after baking.
How to Freeze Chocolate Chip Cookie Dough
To freeze this cookie dough, simply scoop, roll, and press down as many cookies as you’d like on a sheet pan covered with a Silpat or parchment. Place in the freezer for about 20-25 minutes. This quick freeze will help prevent the cookies from sticking to each other. Once they have chilled, place the cookie dough discs in a freezer-safe bag and store in the freezer.
To bake the frozen cookies—remove as many as you’d like from the freezer, place them straight onto a sheet pan covered with parchment or a Silpat, and bake at 350 degrees for just a couple minutes more than you typically would, until they are golden brown and the center is done (12-14 minutes).

Read on for the full recipe for these brown butter chocolate chip cookies!
Once you’ve tried a batch, come back to leave a rating and review down below—I’d love to hear how they turned out for you.

The BEST Brown Butter Chocolate Chip Cookies
Equipment (Includes Affiliate Links)
- GreenPan Sauté Pan or other light-colored pan for browning the butter
- Small Glass Measuring Cup
Ingredients
- 1 cup salted butter (2 sticks) one stick softened; one for browning
- 2¼ cups all-purpose flour (270 g)
- 1 tsp baking soda
- ⅓ tsp salt see notes on salt content above
- 1 cup light brown sugar packed
- 1 tbsp vanilla extract Nielsen-Massey is my favorite!
- 2 tsp maple syrup not pancake syrup!
- ½ cup white granulated sugar
- 2 large eggs
- 1¼ cup chocolate chips
Instructions
Brown one stick of butter (4-5 minutes).
- Cut one stick of salted butter (½ cup) into tablespoon-sized pieces.
- Add the butter to a light-colored saucepan or skillet. Heat on medium and stir. The butter will melt, then bubble and foam. Stir frequently.
- Once the milk solids on the bottom of the pan are a deep golden brown, turn the heat off. Immediately pour the butter into a glass bowl or measuring cup. This entire process, from the time you put the butter in the pan to it being browned, should take 4-5 minutes. For more detailed instructions, along with tips for browning butter, read here.
- Place the brown butter in the fridge to cool for 15-20 minutes. In the meantime, start your cookie dough.
Make the cookie dough.
- In a medium bowl, add the all-purpose flour, baking soda, and salt. Whisk until well combined. Set aside.2¼ cups all-purpose flour (270 g), 1 tsp baking soda, ⅓ tsp salt
- Add one stick of softened butter and one cup light brown sugar to a large mixing bowl (or to the bowl of your stand mixer). Using a hand mixer, beat on low/medium-low speed until smooth—approximately 3-4 minutes.1 cup light brown sugar
- Add the maple syrup and vanilla extract. Beat until combined.1 tbsp vanilla extract, 2 tsp maple syrup
- Pour in the chilled brown butter. Add the white granulated sugar and mix on medium-low speed until well combined. You will notice the dough begin to lighten in color and become fluffy.½ cup white granulated sugar
- Add the eggs and beat until just incorporated. Do not overmix.2 large eggs
- Add the dry ingredients and mix until just combined. Scrape down the sides of the bowl with a spatula or spoon to ensure all dry ingredients are well incorporated.
- Fold the chocolate chips into the dough using a spatula/spoon.1¼ cup chocolate chips
- Wrap the dough in plastic wrap, pressing down to form a large disc.
Chill the cookie dough.
- Option 1: Quick Chill. Place the tightly-wrapped cookie dough disc into the fridge to chill for at least 30 minutes or in the freezer for about 15 minutes.
- Option 2: Longer/Overnight Chill. Chill the dough in the fridge for a few hours or overnight. This longer chill allows time for the flour to fully hydrate and for more flavor to develop.
Bake the cookies.
- Preheat your oven to 350°F.
- Form the chilled dough into 2 tbsp balls (I scoop a generous amount with a #40 cookie scoop). Place on a half sheet pan covered with a silicone baking mat or parchment. Flatten each ball with the palm of your hand to form flat discs.
- Bake 9-11 cookies per sheet pan at 350°F for 11-12 minutes. The cookies will be golden brown and the centers will no longer look wet when they are done baking. Once you remove the cookies from the oven, allow them to sit on the sheet pan for 5-10 minutes, or until the centers are set enough to easily move them with a spatula to a wire cooling rack.
- Optional: Press a few extra chocolate chips onto the top of each cookie when they are still warm from the oven for that aesthetically pleasing, bakery-style look!
- Allow the cookies to finish cooling on a rack. Then, enjoy! Store leftover cookies in an airtight container or bag on the counter.
Notes from the Happy To Be Here Kitchen
Share This Recipe:
Recommended For You
If you like these chocolate chip cookies, I think you’ll love these recipes…
Pin the image below to come back to this recipe later.
