Why You’ll Love These Chocolate Chipless Cookies
- NO Chips—If you’ve ever dreamed of eating a chocolate chip cookie without the chips, these cookies are for you!
- Brown Butter Flavor—The warm, rich nuttiness of brown butter pairs perfectly with vanilla and a bit of maple syrup to create a delicious, flavorful dough.
- Flexible—Bake the cookies after a quick chill, leave the dough in the fridge overnight, or even freeze some dough—so you can have these cookies anytime!
- Beginner-Friendly—Don’t be scared off by browning butter! It’s a quick process that is definitely worth the added flavor. To make things extra easy, I have included step-by-step instructions and tips for browning butter below.
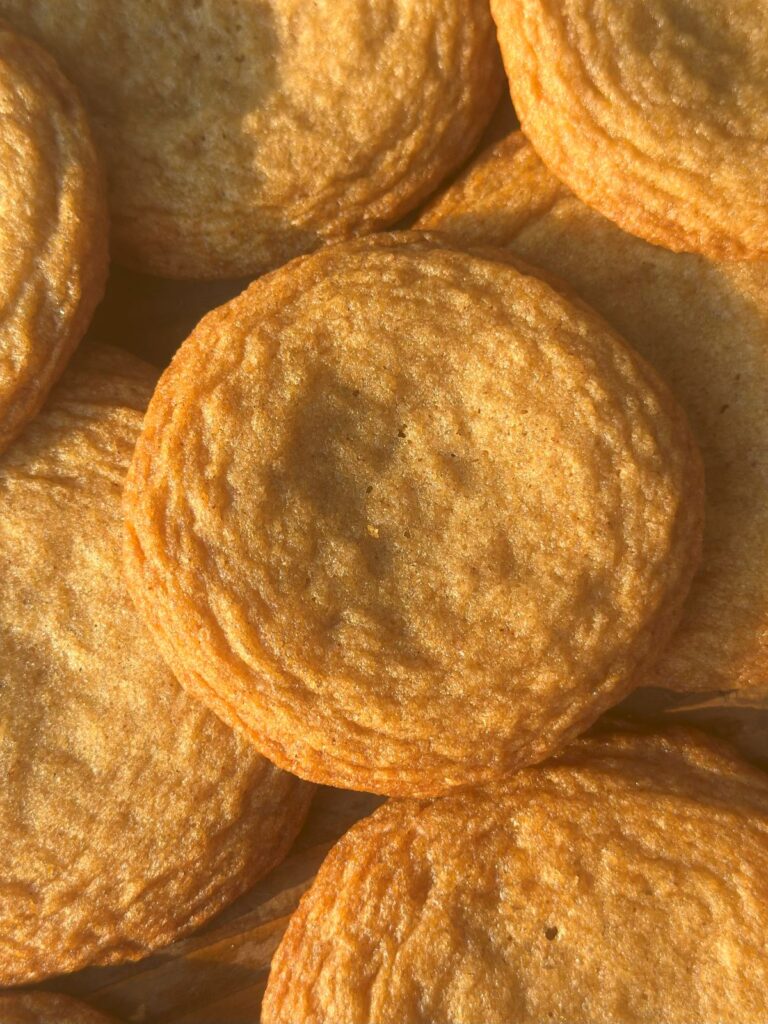
These cookies are just like my favorite brown butter chocolate chip cookies—but without the chips! My mom has been reaching for the chocolate chip cookies with the least amount of chocolate chips ever since I can remember. So, when she mentioned one day that she would prefer them without any chocolate chips at all, this recipe was born.
Now, I know what you’re thinking: A chocolate chip cookie with no chips? It sounds odd, if not a bit sacrilegious, but I am here to tell you that these cookies are so good—and that’s coming from a diehard chocolate fan. I mean just look at my double chocolate chip cookies and chocolate snack cake—I never thought I would be the kind of person to voluntarily leave out the chocolate chips. But these cookies are the exception!
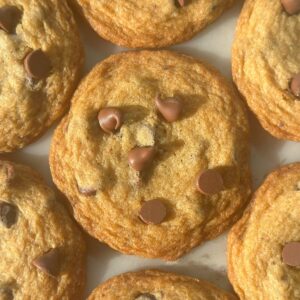
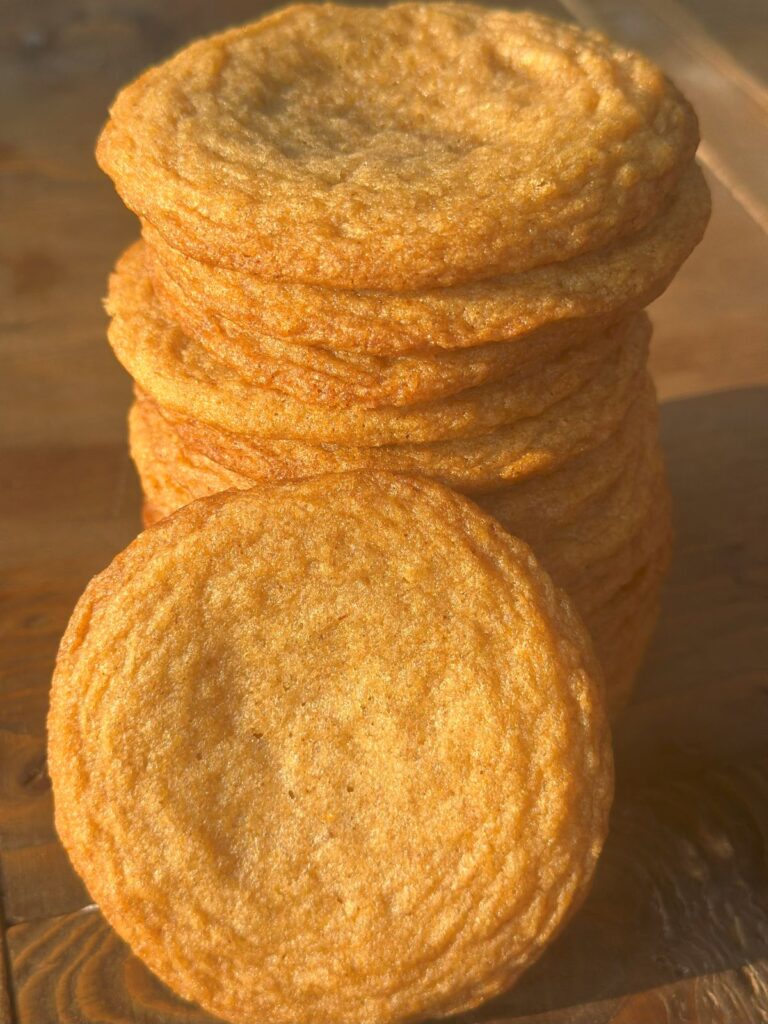
This dough, which was developed over the course of numerous trial batches of the OG chip-filled cookies, now has its chance to shine all on its own. And shine it does! Warm, nutty brown butter mixes with brown sugar, my favorite vanilla extract (shop on Amazon), and just a bit of maple syrup to create the most flavorful cookie dough. The cookies are soft and slightly chewy, with sunken centers and just the right amount of crispness around the edges. Basically, they embody everything I love about a good chocolate chip cookie—minus the chips.
Brown Butter Chocolate Chipless Cookie Ingredient Notes
Butter: I use two sticks (1 cup) of salted butter in these cookies. One stick is browned on the stovetop and chilled in the fridge, and the other is added to the dough as is. Throughout the process of testing batch upon batch of cookies, I found that using half brown butter and half regular butter struck the best balance between texture and flavor. The dough has a warm, rich nuttiness from brown butter but still yields cookies with that classic texture we all love—soft but chewy, sunken in the middle, with slightly crisp edges.
Salt: If you’ve perused HTBH, you might have noticed that I use salted butter in just about all my baked goods. This is simply a matter of personal preference—no judgement to those of you who prefer unsalted butter!
One concern with using salted butter, however, is that different brands include varying levels of salt in their butter. With this in mind, here are some tips for ensuring this dough ends up with the appropriate amount of salt…
- This cookie dough should include 1 teaspoon of salt total (between the butter and added salt). So, if you are using unsalted butter, simply add one full teaspoon of salt to the dough.
- If using salted butter, take a look at the nutrition label of your butter to check the sodium content. Add only the amount of extra salt needed to supplement the salt in two sticks of butter—so you reach a total of 1 teaspoon of salt in the dough.
- To illustrate, 1 teaspoon of salt contains about 2,300 mg of sodium. The salted butter I use contains 90 mg of sodium per tablespoon, so 2 sticks (or 16 tablespoons) contains 1,440 mg of sodium—just about 2/3 of a teaspoon. That’s why the recipe card below calls for 1/3 teaspoon salt—so the dough includes a total of 1 teaspoon salt.
Flour: Either spoon and level your flour, or measure it by weight using a kitchen scale (like this OXO one). You don’t want to add too much flour or you risk the cookies turning out dry!
Vanilla Extract: As Ina Garten would say, use “good” vanilla. There is quite a bit of vanilla in this cookie dough, so the quality really makes a difference! My favorite vanilla extract is this Nielsen-Massey one.
Maple Syrup: Make sure to use pure maple syrup (like this one), not pancake syrup. The maple syrup adds a subtle caramel note that pairs perfectly with brown sugar, brown butter, and vanilla. As an added bonus, it adds a little extra moisture to the dough, which helps ensure moist cookies despite a bit of liquid loss from browning the butter. If you’re not a maple fan, don’t worry! These are not maple cookies—it’s just a background note.
Brown Butter: What Is It?
Brown butter is plain butter that has been heated past its melting point, allowing the milk solids to toast and caramelize. As it cooks, the butter develops a warm, nutty flavor and the milk solids turn a shade of deep golden brown—hence the name “brown butter”.
If you have been curious about baking with brown butter but a little wary of adding this extra step, trust me—it’s so worth it! It will add deliciously rich flavor to the cookie dough for these chocolate chipless cookies. As an added bonus, browning butter is an easy process that only takes about 5 minutes.
How to Brown Butter (For These Cookies)
1. Cut your stick of butter into tablespoon-sized pieces.
This will help the butter melt and cook evenly.
2. Add the butter to light colored pan or skillet.
Place the slices of butter in a single layer across the bottom of a pan or skillet. I recommend using a pan with a light colored interior so you can easily see the color of the butter as it browns—like this GreenPan one.

3. Cook the butter until it browns (approx. 4-5 minutes).
Cook the butter on medium heat, stirring frequently. As the butter cooks, you’ll see it go through a few stages…
1. The butter will quickly melt into a pool of liquid. Use a spatula or spoon to stir so the butter cooks evenly.
2. After a few minutes, bubbles will begin to form on the surface and you will hear the butter start to snap and crackle as it cooks. Keep stirring.
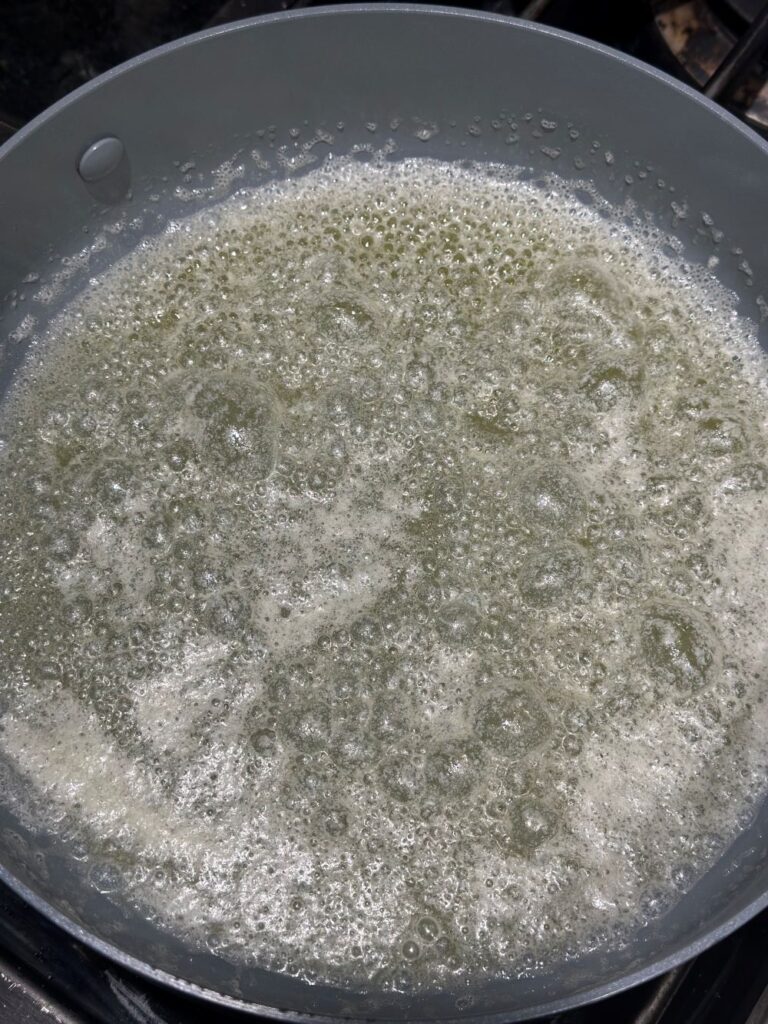
3. The snapping and crackling will subside. Then a white foam will form on top of the butter, and you’ll start smelling a warm, nutty aroma. This is your sign to stir almost constantly as the butter is almost done browning. Since it can be hard to see the color of the milk solids on the bottom of the pan through the foam, you will need to scrape from the bottom and push aside the foamy bubbles to check the color.
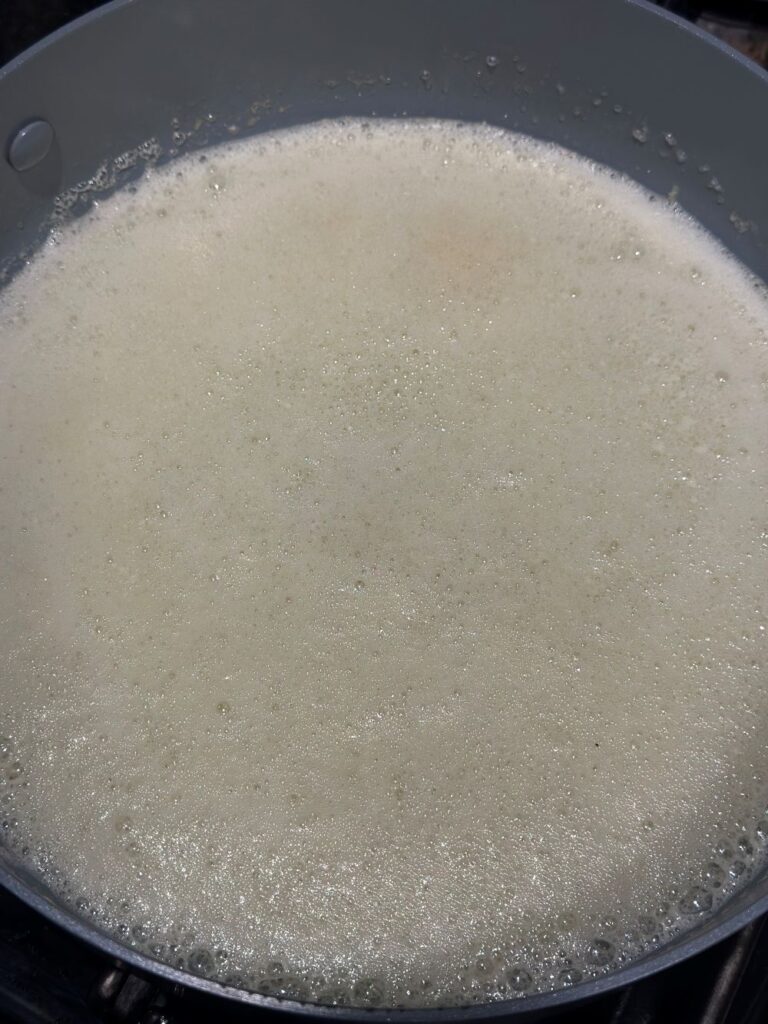
4. Once the milk solids have toasted and turned a deep golden brown, immediately turn off the heat and pour the butter into a bowl or glass measuring cup. The total time for the butter to brown, from start to finish, should be about 4-5 minutes.
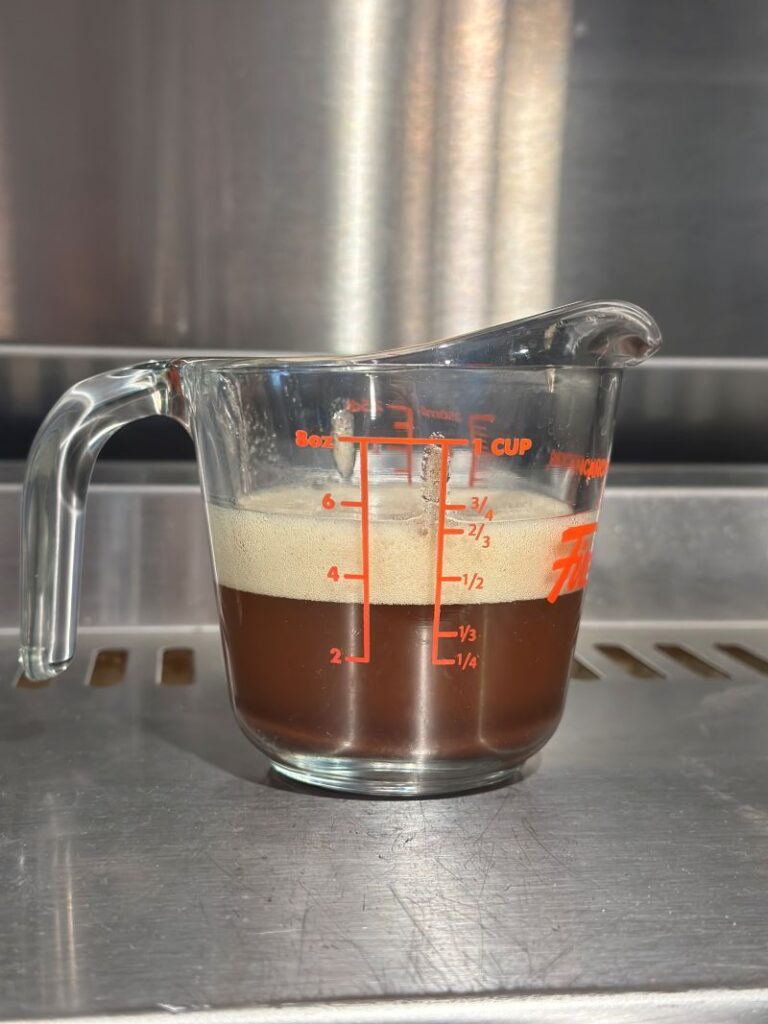
4. Chill the butter in the fridge (15-20 minutes).
Place the brown butter in the fridge to chill for 15-20 minutes. This is key for ensuring a desirable cookie dough texture. If you add hot brown butter to the dough, it may become greasy or grainy.
Tips & Notes for Browning Butter…
- Scrape out all of those toasted milk solids—that’s where a lot of the flavor is! Don’t leave any behind when transferring the butter from the pan to a bowl/cup and when eventually adding the butter to the dough.
- Keep a close eye on the butter, especially when it nears the end of the browning process. Once you hear the crackling subside, stir almost constantly—brown butter can turn to burnt butter before you know it.
- Do not skip the chill. This one is important, so it warrants another mention. Brown butter must cool down a bit before being added to the dough, otherwise it could impact the texture.
- You will lose a little bit of liquid through the browning process. You’ll notice this if you pour the butter into a glass measuring cup. The recipe takes this liquid loss into account.
- If making a double batch of cookies, and thus browning two sticks of butter, expect the browning process to take a couple minutes longer (about 6-7 minutes total).
How to Make Brown Butter Chocolate Chipless Cookies—Step By Step
1. Brown one stick of butter.
Then place it in the fridge to chill for 15-20 minutes. See full, detailed instructions on how to brown butter above!
2. Prep the dry ingredients.
Add flour, salt, and baking soda to a medium bowl. Whisk well and set aside.
3. Start the cookie dough.
In a large mixing bowl (or in the bowl of your stand mixer), add one stick of softened butter and light brown sugar. Using a hand mixer (or your stand mixer), beat on low/medium-low speed for 3-4 minutes, or until smooth. Make sure your butter is softened but not liquidy. Then, add the vanilla extract and maple syrup and beat until combined.
4. Add the brown butter, white sugar, and eggs.
Add the chilled brown butter and white granulated sugar to the bowl and mix on medium-low/medium speed until combined. As you mix, you will see the dough become fluffier and lighter in color. Then, add the eggs and beat until just combined.
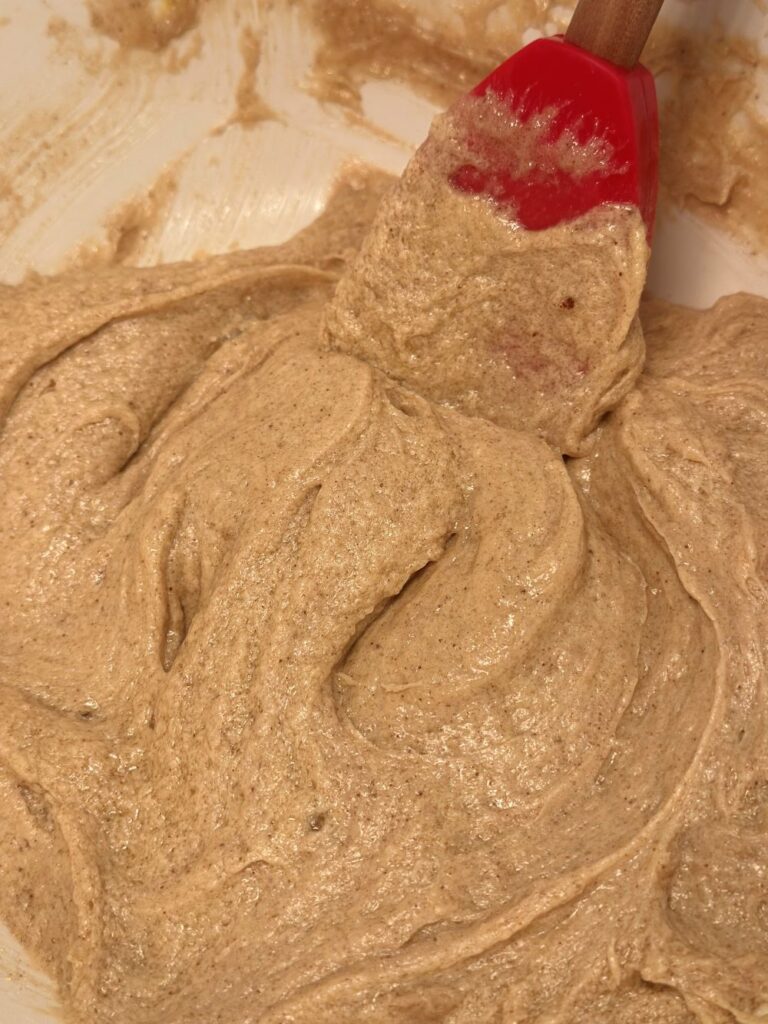
5. Add the dry ingredients.
Add the dry ingredients to the dough and mix on low speed until just combined. Scrape down the sides and bottom of the bowl with a spoon or spatula to ensure all of the dry ingredients are well incorporated.
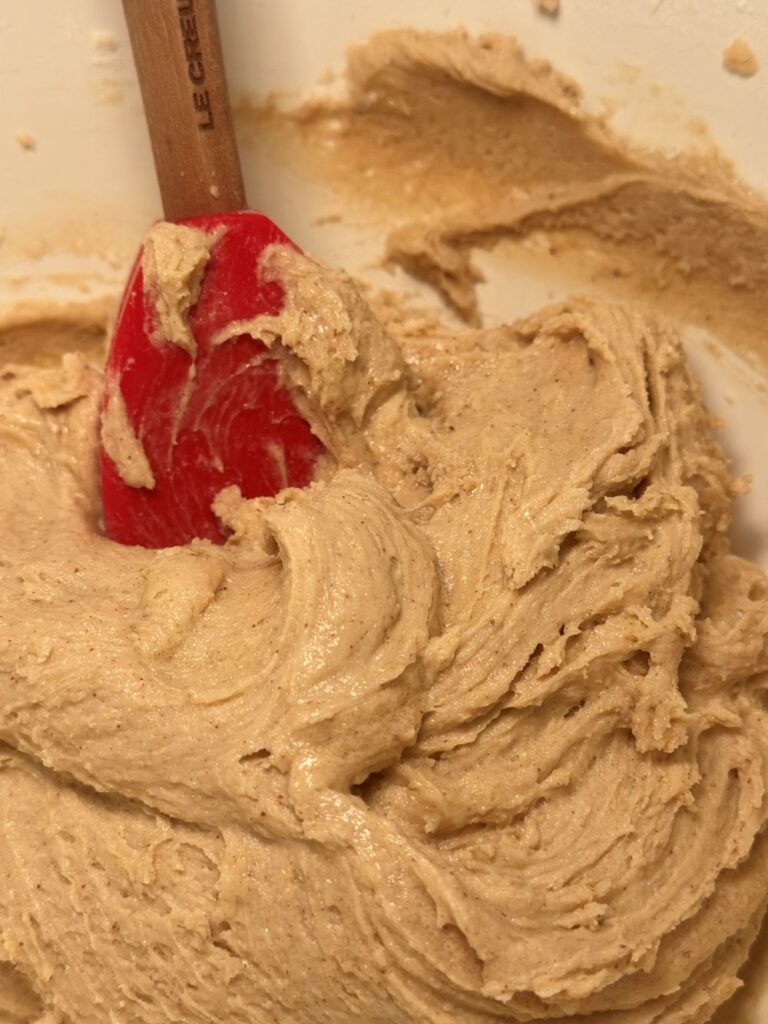
6. Chill the dough (2 options).
Plop the dough onto a large piece of plastic wrap, then use the plastic wrap to press the dough down into a large, flat disc. Wrap the dough disc tightly with plastic wrap. Now, chill the dough—you have a couple options…
Option 1. Quick Chill: Place the dough in the fridge for 30 minutes, or in the freezer for about 15 minutes. This quick chill will allow the dough to set up, making it easier to scoop and shape.
Option 2. Long or Overnight Chill: You may also leave the dough in the fridge for a longer period—such as a few hours, or even overnight. This longer chill allows time for more flavor to develop and for the flour to fully hydrate.
In my experience, the cookies that have chilled chilled overnight (or at least 3-4 hours) have a slightly more developed flavor, spread less, end up thicker, and turn golden brown a bit more easily in the oven.
The cookies quickly chilled in the fridge/freezer are still delicious. However, expect them to brown slightly less and spread a bit more than those chilled for a longer period of time.
Just do not skip chilling the dough. This dough starts off quite pillowy and soft, so you must give it some time to set up—otherwise it will be very difficult to scoop and shape. A longer chill will allow for more flavor and a slightly better bake, but at a minimum you need a quick chill.
8. Bake the cookies.
Preheat your oven to 350 degrees. If your dough has been chilling for a long period of time (few hours or overnight), set it out on the counter for 5-10 minutes to make it easier to scoop.
Scoop the dough into balls measuring about 2 tablespoons. I scoop a generous amount with a #40 cookie scoop (which holds a little over 1.5 tablespoons), roll it between my palms to form a ball, then press it down on the sheet pan to form a flat disc.
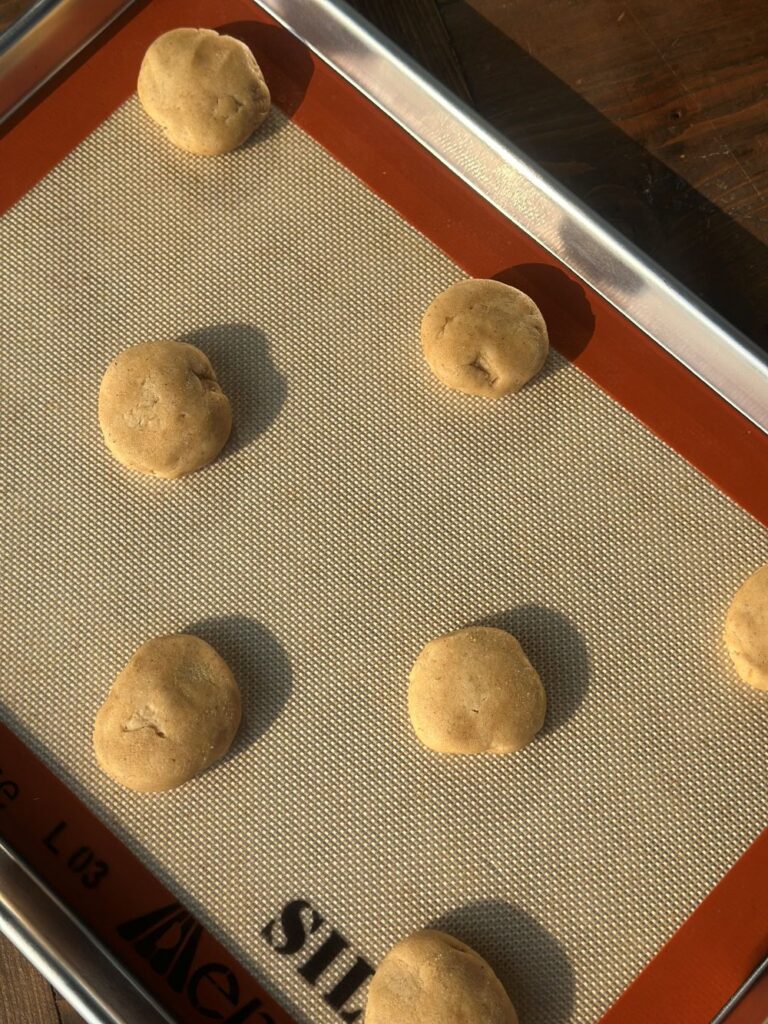
Bake 9-11 cookies at a time on a half sheet pan covered with parchment or a silicone baking mat at 350 degrees for 9-10 minutes. When you remove the cookies from the oven, lightly tap the pan on the counter to allow the middle of the cookies to fall and create those soft, slightly chewy centers.

Allow the cookies to cool on the pan for 5-10 minutes. The cookies will be much too fragile to move right away. Once they have set up a bit, transfer the cookies to a wire rack to finish cooling.
How to Store Chocolate Chipless Cookies
Store any leftover chocolate chipless cookies in an airtight container or resealable bag on the counter for a few days. These cookies keep their soft, chewy texture very well for a couple days after baking.
If the cookies start to dry out a bit—or if you accidentally overbake them (it happens to the best of us!)—just pop a slice of sandwich bread into the container. It’ll help soften the cookies back up by adding a little moisture to the air inside the container.
How to Freeze Chocolate Chip Cookie Dough
To freeze this cookie dough, simply scoop, roll, and press down as many cookies as you’d like on a sheet pan covered with a silicone baking mat or parchment. Place in the freezer for about 20-25 minutes. This quick freeze will make sure the cookies don’t stick to each other. Once they have chilled, place the cookie dough discs in a freezer-safe bag. Store in the freezer—now you can have cookies ready to go anytime you want!
To bake the frozen cookies—remove as many as you’d like from the freezer and place them straight onto a sheet pan covered with parchment or a silicone baking mat. Bake at 350 degrees for just a couple minutes (max!) more than you would typically bake them—until the edges are golden brown and the center is just done. Lightly tap the tray on the counter after removing the cookies from the oven for that sunken in, soft and chewy middle.
Read on for the full recipe for these brown butter chocolate chipless cookies!
Once you’ve baked up a batch or two, leave a rating and review below to let me know how you liked them.
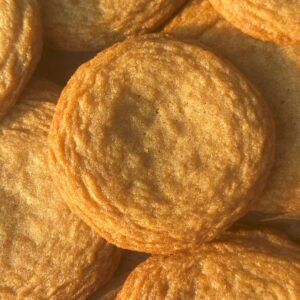
Brown Butter Chocolate Chipless Cookies
Equipment (Includes Affiliate Links)
- GreenPan Sauté Pan or other light-colored pan for browning the butter
- Small Glass Measuring Cup
Ingredients
- 1 cup salted butter (2 sticks) one stick softened; one for browning
- 2¼ cups all-purpose flour (270 g)
- 1 tsp baking soda
- ⅓ tsp salt see notes on salt content above
- 1 cup light brown sugar packed
- 1 tbsp vanilla extract Nielsen-Massey is my forever favorite!
- 2 tsp maple syrup not pancake syrup
- ½ cup white granulated sugar
- 2 large eggs
Instructions
Brown one stick of butter (approx. 4-5 minutes).
- Cut one stick (½ cup) of salted butter into tablesoon-sized pieces. Place in an even layer on the bottom of a light-colored pan or skillet.
- Heat the butter on medium, stirring frequently. The butter will melt, bubble, and then develop a layer of white foam. As the butter nears the end of the cooking process, stir from the bottom and push aside the foam to check the color of the milk solids sitting on the bottom of the pan.
- When the milk solids are a deep golden brown, immediately turn off the heat and pour the brown butter into a bowl or measuring cup. Scrape all of the golden milk solids out of your pan. This entire process should take about 4-5 minutes. For more detailed instructions, along with extra tips for browning butter, read here.
- Place the brown butter in the fridge to cool for 15-20 minutes. In the meantime, start your cookie dough.
Make the cookie dough.
- In a medium bowl, whisk together the all-purpose flour, baking soda, and salt. Set aside.2¼ cups all-purpose flour (270 g), 1 tsp baking soda, ⅓ tsp salt
- Add one stick of softened butter and one cup light brown sugar to a large mixing bowl (or to the bowl of your stand mixer). Using a hand mixer, beat on low/medium-low speed until smooth—approximately 3-4 minutes.1 cup light brown sugar
- Add the maple syrup and vanilla extract. Beat until combined.1 tbsp vanilla extract, 2 tsp maple syrup
- Pour in the chilled brown butter. Add the white granulated sugar and mix on medium-low speed until well combined. You will notice the dough begin to lighten in color and become fluffy.½ cup white granulated sugar
- Add the eggs and beat until just incorporated. Do not overmix.2 large eggs
- Add the dry ingredients and mix until just combined. Scrape down the sides of the bowl with a spatula or spoon to ensure all dry ingredients are well incorporated.
- Wrap the dough in plastic wrap, pressing down to form a large disc.
Chill the cookie dough—2 options!
- Option 1: Quick Chill. Place the tightly-wrapped cookie dough disc into the fridge to chill for at least 30 minutes or in the freezer for about 15 minutes. Cookies chilled for a short period of time will spread more, making them thinner.
- Option 2: Longer/Overnight Chill. Chill the dough in the fridge for a few hours or overnight. This longer chill allows time for the flour to fully hydrate and for more flavor to develop. Cookies baked after chilling for a longer period of time will spread less and be slightly thicker.
Bake the cookies.
- Preheat your oven to 350°F.
- Form the chilled dough into 2 tbsp balls (I scoop a generous amount with a #40 cookie scoop). Place on a half sheet pan covered with a silicone baking mat or parchment. Flatten each ball with the palm of your hand to form flat discs.
- Bake 8-10 cookies per sheet pan at 350°F for 9-10 minutes. The cookies will be golden brown and the centers will no longer look wet when they are done baking. Once you remove the cookies from the oven, allow them to sit on the sheet pan for 5-10 minutes, or until the centers are set enough to easily move them with a spatula to a wire cooling rack. These cookies will be very fragile right out of the oven, so you must let them sit on the pan to set up.
- Allow the cookies to finish cooling on a wire rack. Then, enjoy! Store leftover cookies in an airtight bag or container on the counter.
Notes from the Happy To Be Here Kitchen
Share This Recipe:
Recommended For You
If you like these chocolate chip cookies, I think you’ll love these recipes…
Pin the image below to come to this recipe later.


